Laminating your print media? The 7 advantages explained!
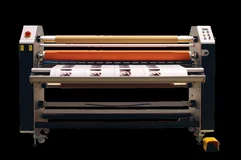
Laminating your printed materials? For some people, it is a no-brainer, while others consciously avoid it. In this article, we will discuss the seven most important advantages of laminating printed materials. Laminating may be the last step in your production process, but it is certainly not unimportant! And to make sure that your next lamination job is a success, we conclude with some handy tips.
1. Laminating makes your printed material thicker and more robust
The transparent film applied during lamination makes the printed material thicker and more resistant to mechanical wear. Therefore, it is important to ask yourself whether your print material is likely to be wrinkle through use. If this is the case, then laminating is recommended. There are several advantages when you choose to laminate. For example, you can apply a laminated sticker more easily, there is less chance of air inclusions under the sticker, and the sticker is less likely to wrinkle. This also makes the sticker easier to remove if you want to do so in the future.
2. Laminating protects against UV radiation
If your printed material is exposed to many environmental factors, such as the sun, there is a high risk of discoloration. UV-B rays cause the ink to fade. Laminating your work with protective films with integrated UV protection slows down or prevents this process and ensures that your prints retain their beauty much longer.
3. Laminating protects against moisture and dirt
Laminating your work also prevents moisture from penetrating your printed materials and dirt, e.g., from greasy fingers, from sticking to them. This not only protects your prints from water damage, for example, but also makes them easy to clean. This is very handy when you are dealing with outdoor applications.
4. Laminating protects against damage
Tears and creases do not stand a chance when your work is properly laminated. By using a scratch-resistant material, you can provide your printed material with a scratch-resistant layer. This is often applied to print media for display panels of pop-up systems. These panels have to endure a lot during transport, assembly, and disassembly. It, therefore, makes sense to laminate frequently used panels to provide better protection.

5. Laminating gives a luxurious appearance
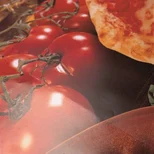
Laminating, also known as finishing, is a finishing technique that gives printed material a luxurious and characteristic appearance. Laminating makes the paper appear and feel firmer, making the quality appear (and be) better. A wide range of finishes is available, ranging from matt, satin, glossy and high gloss. Depending on the application of the printed material, you can choose the most suitable finish. Using glossy laminates, for example, colors come out more powerfully. And the use of matte films prevent disturbing light reflections, for example, in photo posters.
6. Laminating increases the lifespan of printed materials
The protective layer of the laminate also increases the lifespan of your printed material. You have to keep in mind that prints that are not protected against mechanical or environmental influences have a limited lifespan. Therefore, you can say that applying a protective film extends the life of prints and secures their value. A not unimportant finishing touch!
7. Laminating provides your printed material with special properties
In addition to the standard laminating films mentioned above, there are also laminating films with unique properties. For instance:
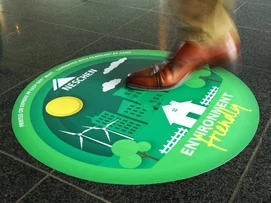
- Adding an anti-slip texture to floor graphics: to prevent slipping and to protect against moisture and dirt.
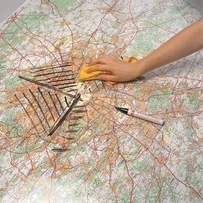
- Creating a writable surface for whiteboard applications: ideal for maps, for example.
- Preventing vandalism by adding anti-graffiti properties: paint and permanent markers are easy to remove with cleaning agents.
- Providing a scratch-resistant layer with the display panels mentioned above: scratches are less easily visible on pop-up panels, for example.
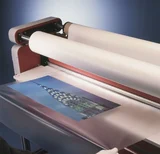
Tips for successful laminating
 Are you convinced of the benefits of laminating? Then it’s up to you to carry out the laminating process successfully. We’ll help you on your way with our tips and instructions:
- Work clean, dry, free of dust and grease: Use a PCR roller to remove dust and dirt.
- Use the same material combinations as often as possible: a PVC monomer laminate for a PVC monomer print material and, for example, polyester on polyester. Matching base materials behave similarly, which will prevent, for example, shrinkage of the edges.
- Drying time: Especially when laminating inkjet prints, make sure that the inks dry sufficiently and cure completely. Consider a drying time of at least 24 hours.
- Avoid silvering: The fine trapping of air between the print and laminating film is called silvering. Silvering can be difficult to detect due to its fine texture and is particularly noticeable on dark prints. Heating the roll slightly to 30 degrees during lamination will help the adhesive flow better and prevent silvering.
- Let the print rest for 24 hours after laminating: After laminating, allow the print to acclimatize at room temperature for 24 hours before proceeding with further operations. This will ensure optimal adhesion of the adhesive and allow the film to “relax”.
- Send laminated printed material: If you want to send your printed material rolled up, make sure that you roll the material onto a large core with the image side outwards. This prevents the rolled-up print from tunneling after it has been unrolled.
Make your next laminating project a success
Laminating is the finishing touch to your printed material and can greatly influence the final result. But with these tips, the result will certainly be a success. Would you like to do some tests with laminate? For example, to protect important printed material, add an anti-slip layer to floor graphics, or counteract reflections on photo posters? Ask us for a sample – without any obligation!